Only two P's?
Hum...recently I think I've experienced a lot of P's...Plans, Phases, Passion, Patience (or lack of), Persistence, Perseverance, Progress....and a little Pleasurable Playfulness along the Path...although that wasn't a true Picnic....
What in the world am I rambling about now? What is the Purpose of today's blog and why Prolong the suspense?
Well, in Part it has to do with my Passion of quilting and taking advantage of an opportunity to increase the Perimeter for this Pleasing Pastime of mine... and it all began with the Pursuing of the re-Placement of our roof instead of the Previous Patching Performed Post Ike (Hurricane 2008)....
 Yes, by the Provision of the good Lord we now have a roof over our heads that no longer leaks. This was Phase One of our Plans... (And because I hear your cry of please I will slow down the P's, well, maybe).
Phase Two (sorry, don't know another word to substitute for phase...well, I could have used development or episode, but I like the word phase...) Uh, hum. Phase Two of our repairs would be to replace the ceiling in the living area and the studio that had been damaged due to the leaky roof....but Phase Two got interrupted by my Perception that now would be a good time to enlarge my territory...so Phase Two got Pushed back to Phase Three...How's that for a Prologue.
You see, my Plans have been in the dream stage for a long time now to remove a Partition behind my studio that separated it from the "laundry room" and back door....a good sized room.
 All that was Preventing me from this additional growth for my quilting Passion was this one wall...
 Disclaimer: you have to realize that these Photos on either side of the wall were taken in Progress, Prior to removal of the wall but after the removal of lots and lots of stuff. Imagine that junk drawer of yours, you know, the one where everything gets dumped in when you don't know what to do with it? Now imagine an 8 x 20 junk room and you've got the Picture! Disclaimer Number Two: none (I repeat NONE) of the things stored in this area could be considered Junk - more like displaced items that need a home (or should I say Proper Placement).
Okay, back to my Jericho wall....you know, the one that needed to come tumbling down... Well that wall also had a closet attached, so that came down first...
 Okay, clarification here, those buckets aren't dye buckets as someone asked (a logical question considering I'm a quilter)...they are buckets full of wheat kernels - the type that one would grind up to make whole wheat bread. In my earlier life I was the Little Red Hen and baked 40 loaves of bread every Thursday for a health food store...but that's a whole 'nuther story. These buckets have been moved more times than we'd care to confess since those days and now that they are exposed to the light of day I hope to once again bake bread, only not on a large scale, just for family and close friends...
 Once the Paneling was removed from the laundry room side of the wall it was revealed that it was a true Jericho wall and would need lots of Persistent Pounding for it to come down! This house was built around 1968, with our Purchasing it in 2005 (found another P!!!!). Obviously it was well built - ship lap (or tongue and groove - a nice word Picture) makes for one strong wall! Something to be thankful for during storm season, but not during remodeling...
I thought you'd enjoy my Preparedness. I Purposefully Protected my longarms from any Possible Pieces of rubble or dust from the Project...
 Oh, and for the record of this Proclamation, here's the Profile of the laundry room area showing my Procrastination of Pursuing a Palatable Practice of Provision for order.
 Ah, sometimes it's best to fall back and Punt...we called in Professional Participants and that wall came out without Protest!
 As did the Partition around the water heater, which Presented a Problem and Propelled us along yet another Path Pushing back Phase Three to Phase Four, or Perhaps from a different Perspective, Phase Two became an upgrade now known as Phase Two Point Five (2.5 for those I've Perplexed with my Prolific Publishing of P words).
 Yes, it was Prudent that we not Play around with the Possibility of the Past Passable leak becoming Problematic in the Perceivable future, so in Popped a new water heater in the middle of our best laid Plans.
 Now isn't this a nice Perspective, Progress at it's best. Phase 2 and 2.5 are near Perfection. I can begin to visualize the Possibilities of this Portion of the Project and it's most Pleasing.
 With the wall removed the Preparation for Phase Three must be carefully Planned...the replacement of the ceiling tiles...
 Oh! Stop the Press, I forgot! It's time to Primer and Paint over that Preposterous Paneling that has Plagued me for years! Phase 2.9 Perhaps?
 Here's a Peak. Although in some light the walls have a Pinkish cast, they are really a Pale Purple... Purple Mist according to the Paint Pail.
  Have you been Perplexed and Puzzled over the POD at the Preface of this Post? Well, here's the Proof that it has a Part in this Play by Play ramble of our remodeling...
 I could write a Preamble and a Point by Point outline on "How to move your studio and living area into a 16 foot POD" but I am too Pooped just recalling the Procession of Packing my Provisions into such a tiny Pocket.
 All this must go into that? I Pondered...
 We Poked and Prodded and Pushed ....
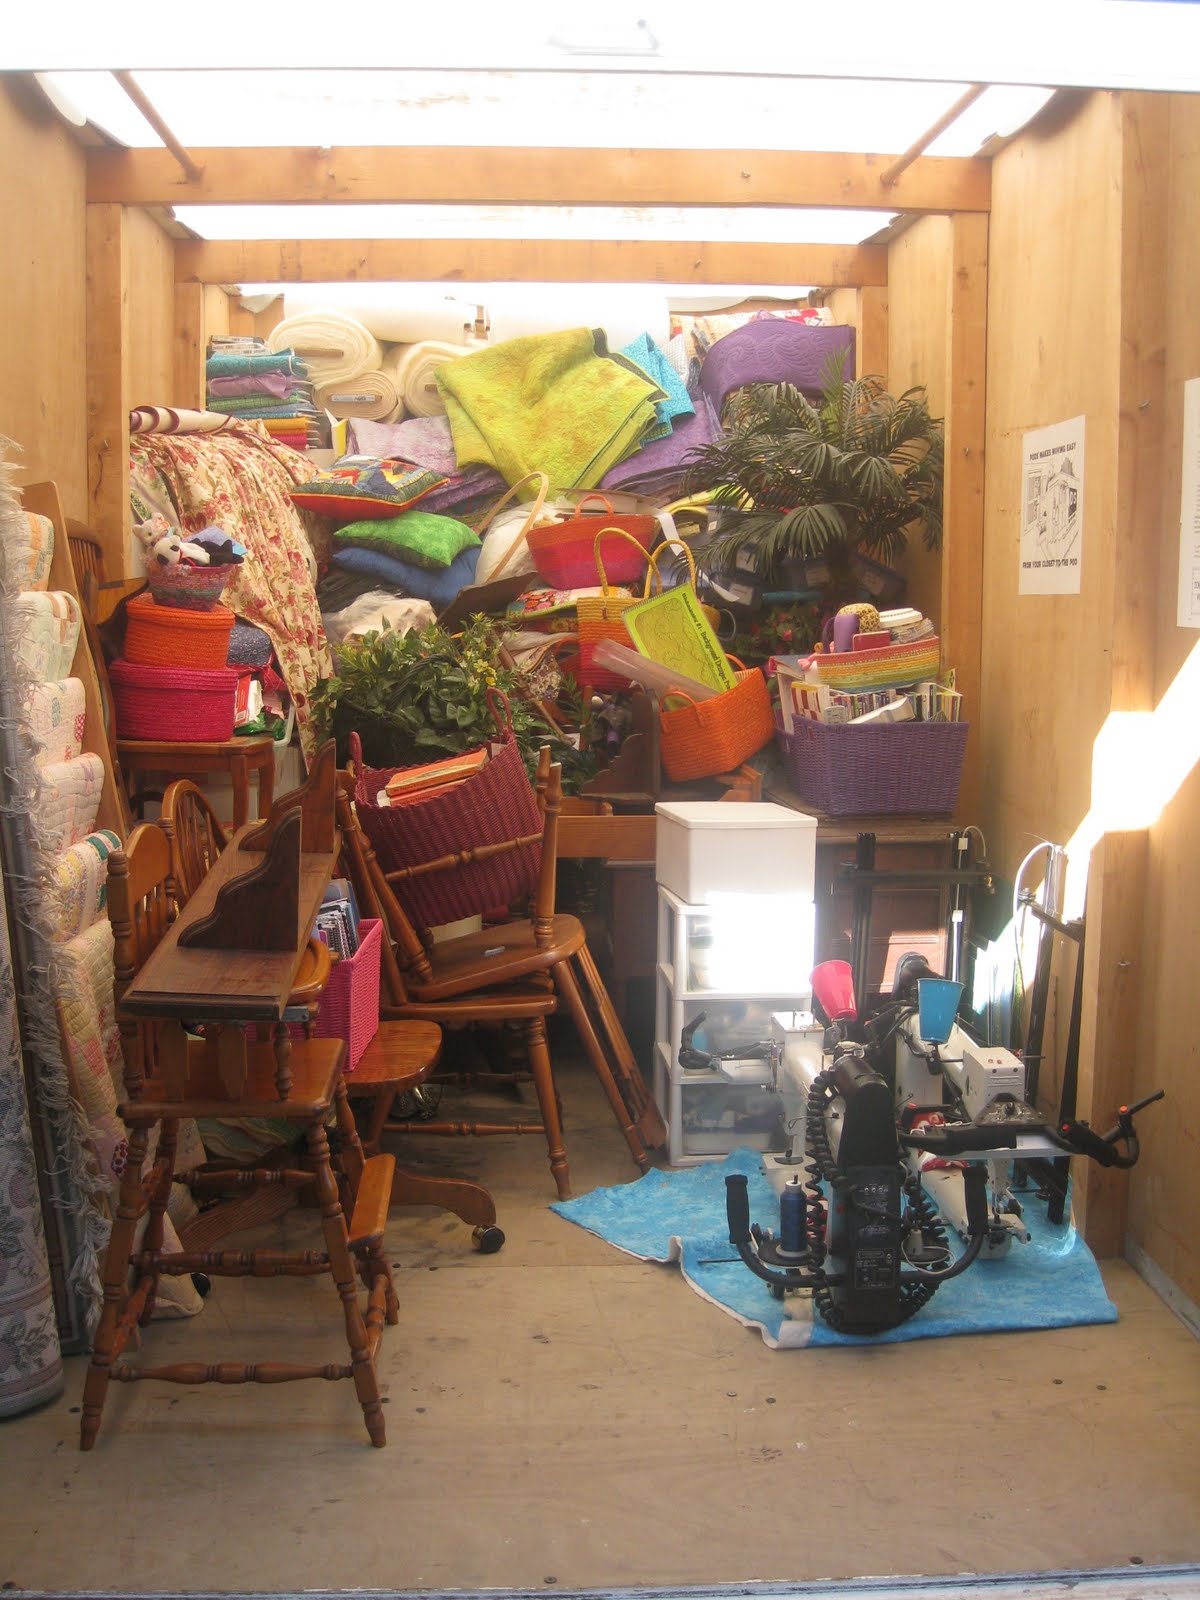 As we Painstakingly Packed with Persistence (and Perspiration!) Do you see my Palm tree, my longarm heads and my sewing machines? These are a few of my Precious Possessions (but not to be confused with my Purpose for living).
  After a Period of time, which seemed like a Perpetual Parade to the POD, the Prep work was done, leaving only a few Precarious items Present in the rooms.
 Pursuant to Professional Prodding I Painstakingly covered the longarm table, thread cabinets, and sleeper sofa in Plastic to Prevent dust from Permeating in areas that I don't wish to be Polluted.
 Preparation for Phase Three Performed. Time for some Postponed Pleasure, the Perks of Persevering .... a walk in the Park and the Pursuit of high Priority Purchases (new jeans)....
The calm before the storm.
Little did I Perceive the upcoming Postponement....I was Prepared, but the Procession was Prolonged...An emotional day full of Pouting, as I was Perturbed at the delay and Pestered everyone I knew with my Problem...a day that would have been better spent in Prayer for Patience...I've since repented.
Today was a new day! Full of grace and mercy. While my faithful Pup Pixxie and I set up Peripheral Provisions in the back yard under the Tiki Hut (to not Put out the workers or be in the way of Production), the Process has begun - the removal of the old ceiling!
 With Piles to Prove it!
My Perspective has improved, I know it's a long Path on this Phase Three....and that I'm sure to be Perplexed at times. (and Pester my friends)...but I'm too Pooped to Ponder those Possibilities. I think it's time to call out for a Pizza!
Jeremiah 29:11 (New International Version, ©2011)
11 For I know the plans I have for you,” declares the LORD, “plans to prosper you and not to harm you, plans to give you hope and a future.