
 The phone rang just a few short days before Christmas. I wasn't where I could answer it so it went to voice mail. Upon checking my messages I discovered that someone had been referred to me, as a professional quilter - their inquiry? the possibility of a "memory quilt" for a daughter who was to be laid to rest the following day.
As I listened, my heart broke for this family and their sorrow in losing a precious daughter, especially at the holidays - as I too have lost family members during this season and know first hand the emotions.
 Knowing that the design's focus would be a snowman I began researching images on the internet for snowmen, snowflakes, and cardinals - the family mentioned that cardinals were very symbolic and sentimental in their memories so three cardinals were to be a part of the plan. Several sketches later I emailed the design below as a starting point for developing the look they wanted to achieve.
 It was then that I felt the quilt should be called Essence of Jennifer. We made an appointment to get together to tweak the design. I felt like a school teacher with my red pen (grin) as we tried to make some notes and ideas of how he really should look...
 Weeks later we all agreed on this design.
 By now the spring had turned to fall. So many interruptions to this mission .... delays included the fabric being on back order for weeks, as well as my other obligations - other customer quilts, traveling to set up quilting machines, etc.

 In keeping with traditional wholecloth design elements I wanted to include radiating lines to help draw the eye towards the center where the focus would be on the snowman and the three cardinals representing family memories. During the design process we all three agreed that we liked the traditional feather cable design...I had just the perfect stencil for that!
 Marking was tedious work, it literally took all day...and a little more...OOPS! All the careful measuring and math didn't compute... coming down the side and turning the corner - GASP! the design elements didn't match up. Time to pull out the "eraser" - a special pen designed to remove the blue markings.
 That was slow going, so I got out a spray bottle full of water - after all, it is water soluble marking pens right? And I had a lot of territory to undo...
 Of course, the negative to all this water is having to wait for the area to dry before remarking. One might think you could speed up the process by blow drying with a hair dryer or perhaps putting in the dryer...however, heat would set the blue marking pen permanently. Not desired!
 You might notice the pen at the base of the snowman and that big blank area - that's another small oops (grin) This time instead of using the "store bought" eraser or a squirt bottle (whose over spray erases more than you want sometimes) I used a water marker from a kids toy called AquaDoodle. I prefer this as it's not only efficient (time wise and no over spray) but it's economical - simply refill with water as needed.
 You may wonder where the blue lines are... well, once I quilted the area I would spray with the spray bottle to temporary remove the lines so I could "see" my work. It was a temporary fix as the blue lines would sometimes reappear. Not to be alarmed, this is normal until the quilt is fully immersed in water and not just sprinkled.
 Life has its interruptions and so does the ebb and flow of quilting. The snowman had to be unzipped from the frame for a short period of time, but only after it was stabilized - meaning I had outline quilted all the border (before the details were added as seen in the photo above) and once the snowman was outlined as well as all the radiating lines quilted....couldn't risk any fabric shifting that could cause potential problems later on.
 This short "time off" gave me an opportunity to hang up the quilt to better see the design and the progress instead of just the exposed area on the quilt frame. It was beginning to look a lot like Christmas!
 You can see how tiny the feather puffs are...that's the top of a flower head pin above and the hopping foot on my longarm below is a quarter inch from the needle to the outside edge...gives you some perspective.
 Here's a view of the snowman being surrounded by the background fill.
 Once all the quilting was complete it was time for the true test to see what it looked like without all the blue lines. Into the washing machine it went. Only a rinse cycle with NO detergent.
 Hallelujah, all the blue lines disappeared in the wash. But to make sure I had to air dry the quilt instead of putting it in the dryer, again, heat sets in the blue lines...the proof that all would be well would come the next day after it was dry.
 Then add the bias binding, then trim the excess away...then hand sew the binding down on the back...
 Then back in the wash again. I did this for two reasons, I wanted the binding to "pucker up" just like the rest of the quilt and I also wanted the fabric to loosen up a tad. This time I used a mild detergent and indeed dried it in the dryer on low heat.


 Unfortunately I'm not a professional photographer, and the lighting isn't always the best, but I hope you will enjoy looking at the close ups. I believe if you click on the photo that it will enlarge..


That was Christmas 2009. I returned the call to find out more details. Their beautiful adult daughter had just passed and they had been told that I could take articles of clothing and make a quilt. Yes, I could do that. Would it be possible to have a snowman on the quilt? Jennifer loved Christmas and especially snowmen.... there was a special black velvet dress that would be perfect for the top hat....
We agreed to meet after the holidays to develop a design for their memory quilt. Prior to our meeting I sketched out a rough draft in Electric Quilt 6 (above) to see if this would meet with their approval.
Mid January 2009 I met R. & C., lovely people who obviously had a deep love and a deep sense of loss for their daughter Jennifer. As we got to know each other a bit they shared about their daughter, a woman full of grace and beauty with lots of love to share to those around her, both family & friends as well as strangers. We talked about some of the quilts on my webshots/website and how collectively we could come up with a pattern that would best honor their love for Jennifer.
I'm not exactly sure how we came to the conclusion that what they really wanted was a wholecloth with a snowman, but that's where we landed.
A wholecloth quilt is just what it sounds like..a whole piece of fabric, no piecing, nothing appliquéd, where the design is done simply in thread. Traditional wholecloths are white fabric with white thread, and have also been called white work. Artist license in modern quilting has embraced non-traditional wholecloths where the fabric can be any color, the thread any color, and may even include fabric paint or embellishments. Ours would be traditional. I remember my thoughts at the time what an honor to be a part of something that is going to be a true heirloom.
My quilting schedule was pretty booked for the spring, and I knew that the quilting would take a lengthy time to complete. I wasn't sure of a time frame... R. & C. were most gracious in not wanting to rush things and allowing me time to develop and implement the design.
 Knowing that the design's focus would be a snowman I began researching images on the internet for snowmen, snowflakes, and cardinals - the family mentioned that cardinals were very symbolic and sentimental in their memories so three cardinals were to be a part of the plan. Several sketches later I emailed the design below as a starting point for developing the look they wanted to achieve.
  It was then that I felt the quilt should be called Essence of Jennifer. We made an appointment to get together to tweak the design. I felt like a school teacher with my red pen (grin) as we tried to make some notes and ideas of how he really should look...
 Weeks later we all agreed on this design.
  By now the spring had turned to fall. So many interruptions to this mission .... delays included the fabric being on back order for weeks, as well as my other obligations - other customer quilts, traveling to set up quilting machines, etc.
The day finally came when the fabric arrived and I could begin the marking. Our snowman was enlarged to become the center medallion of a queen size quilt. Using blue marking pens, that are water soluble, I began the lengthy process of transferring my "idea on paper" to my "design on fabric".

 In keeping with traditional wholecloth design elements I wanted to include radiating lines to help draw the eye towards the center where the focus would be on the snowman and the three cardinals representing family memories. During the design process we all three agreed that we liked the traditional feather cable design...I had just the perfect stencil for that!
 Marking was tedious work, it literally took all day...and a little more...OOPS! All the careful measuring and math didn't compute... coming down the side and turning the corner - GASP! the design elements didn't match up. Time to pull out the "eraser" - a special pen designed to remove the blue markings.
 That was slow going, so I got out a spray bottle full of water - after all, it is water soluble marking pens right? And I had a lot of territory to undo...
 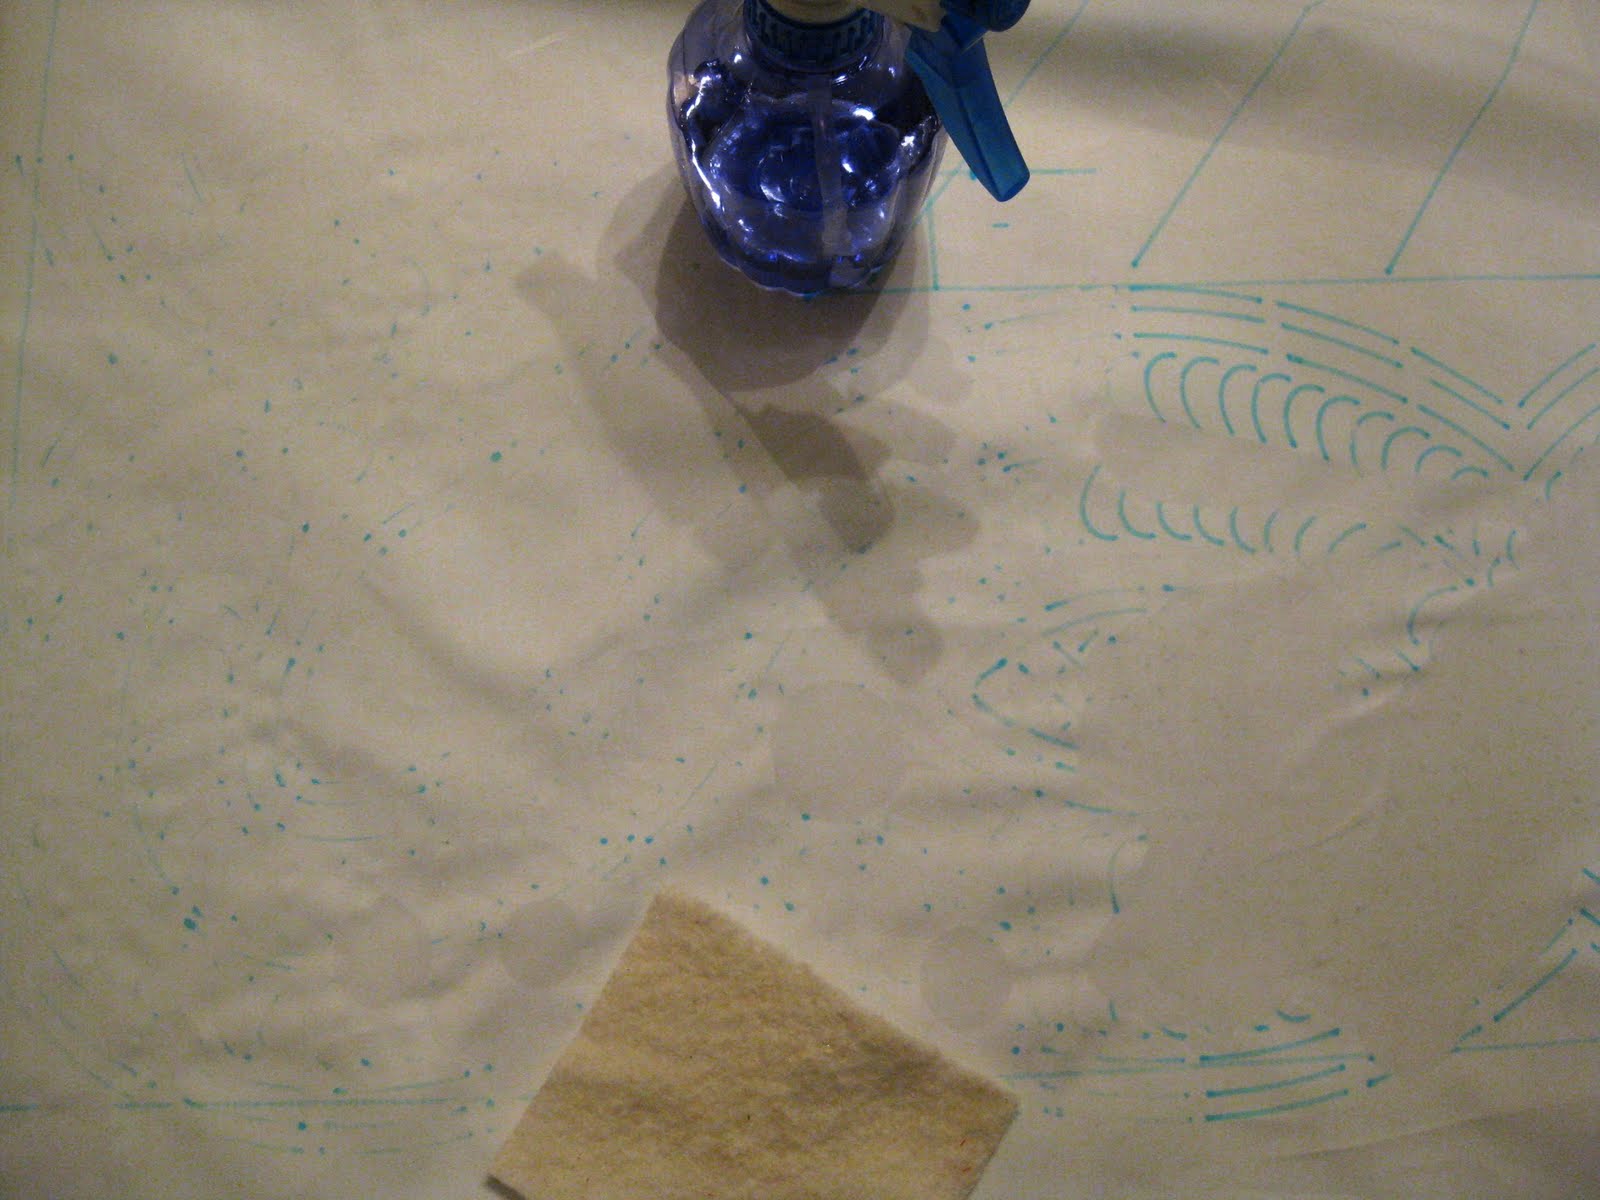 Of course, the negative to all this water is having to wait for the area to dry before remarking. One might think you could speed up the process by blow drying with a hair dryer or perhaps putting in the dryer...however, heat would set the blue marking pen permanently. Not desired!
Finally the border, radiating lines, and the outline of the snowman was complete - all that was left was a little detail work. Back to the computer for snowflake images to trace.
 You might notice the pen at the base of the snowman and that big blank area - that's another small oops (grin) This time instead of using the "store bought" eraser or a squirt bottle (whose over spray erases more than you want sometimes) I used a water marker from a kids toy called AquaDoodle. I prefer this as it's not only efficient (time wise and no over spray) but it's economical - simply refill with water as needed.
The day finally came when it was time to load the snowman on the frame....
 You may wonder where the blue lines are... well, once I quilted the area I would spray with the spray bottle to temporary remove the lines so I could "see" my work. It was a temporary fix as the blue lines would sometimes reappear. Not to be alarmed, this is normal until the quilt is fully immersed in water and not just sprinkled.
 Life has its interruptions and so does the ebb and flow of quilting. The snowman had to be unzipped from the frame for a short period of time, but only after it was stabilized - meaning I had outline quilted all the border (before the details were added as seen in the photo above) and once the snowman was outlined as well as all the radiating lines quilted....couldn't risk any fabric shifting that could cause potential problems later on.
 This short "time off" gave me an opportunity to hang up the quilt to better see the design and the progress instead of just the exposed area on the quilt frame. It was beginning to look a lot like Christmas!
The final element was adding all the tiny detail and background fill. I wasn't really sure how to implement this, what sort of design did I want to do? Hum...this has been my year for "feather puffs", a design I developed earlier in the year and used on several customer quilts (including one that won a ribbon and one that was published in a book)...seems like that just might work, it would certainly add some movement and perhaps convey the illusion of snowflakes around the snowman...
 You can see how tiny the feather puffs are...that's the top of a flower head pin above and the hopping foot on my longarm below is a quarter inch from the needle to the outside edge...gives you some perspective.
 Here's a view of the snowman being surrounded by the background fill.
 Once all the quilting was complete it was time for the true test to see what it looked like without all the blue lines. Into the washing machine it went. Only a rinse cycle with NO detergent.
  Hallelujah, all the blue lines disappeared in the wash. But to make sure I had to air dry the quilt instead of putting it in the dryer, again, heat sets in the blue lines...the proof that all would be well would come the next day after it was dry.
Sigh of relief! All dry, very wrinkled and not looking like I envisioned, but knowing it wouldn't look "finished" until it was. Now it was time to draw the scallop edge...
 Then add the bias binding, then trim the excess away...then hand sew the binding down on the back...
 Then back in the wash again. I did this for two reasons, I wanted the binding to "pucker up" just like the rest of the quilt and I also wanted the fabric to loosen up a tad. This time I used a mild detergent and indeed dried it in the dryer on low heat.
He came out happy!

Here's Essence of Jennifer in her full glory
Designed & Quilted by Karen E Overton
 Unfortunately I'm not a professional photographer, and the lighting isn't always the best, but I hope you will enjoy looking at the close ups. I believe if you click on the photo that it will enlarge..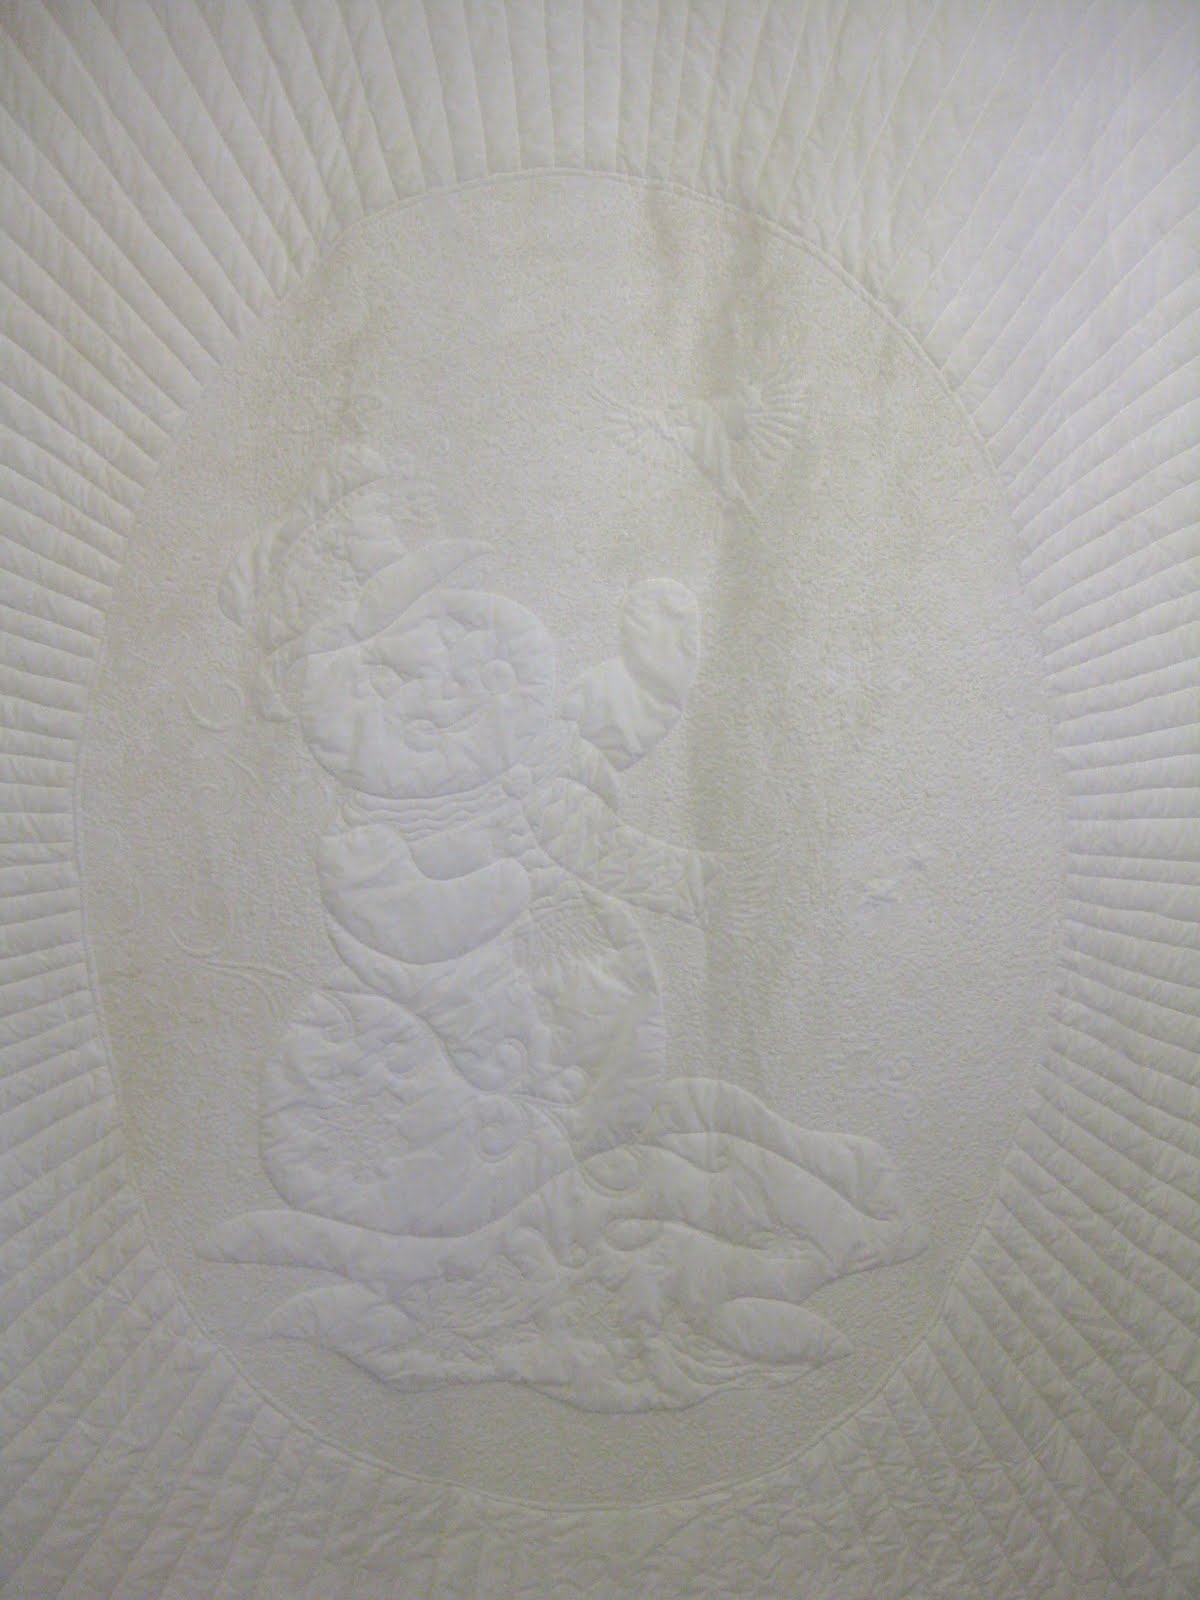


I couldn't resist...wanted to see how she looked on a bed...

and of course Pixxie couldn't resist the opportunity to be in a photo!

I'm not 100% sure, but I do believe that R. & C. picked up their heirloom a year to the date of calling me....
As I worked on this quilt, or thought about this quilt, throughout the year my thoughts and prayers were with this family - that they would be comforted in their loss and that somehow the works of my hands would give them joy in the mist of their sorrow.
Christmas is truly in the heart.
Merry Christmas to all!


