
True confessions. My bags have bags!
I have this thing for bags, or maybe it's the need to feel organized? Whatever, it translates into a lot of fun looking for bag patterns, shopping for bags (as in my recent adventure on our cruise in February), and ultimately making bags.
The colorful stripe bag in the left center is an eyeglass case I picked up in Mexico, the other little bags were made from quilted scraps left over from bigger bags! I don't think I can ever have enough bags.
 A weekend or so ago I made the bag on the right and liked it so much that I thought I needed to make another one after dinner last night - don't you just love the jellybean fabric? Just in time for Easter! The pattern is called Princess Bag and its from the book Easy to Make Totes With Zippers by Cindy Taylor Oates.
 Well, I had some fabric left over... and about that time I get a phone call from my girlfriend Pam in Tennessee so I'm telling her all about the new bags and decided that I'd just sew a new little bag to hold my lipstick and such, telling her that I could do a little bag in 5 minutes or less. She didn't believe me so I said "time me" and I sewed while we talked (bluetooths are wonderful inventions). And ta-da - my 5 minutes or less little bag was actually 4 minutes. Needless to say she was impressed and I sent her this photo to prove it (grin).
 Little bags are like sour cream and onion potato chips, you can't have just one. Even though it was late in the evening I was in the mood to make little bags!
Remember the Amy Butler Carry All bag I made earlier this year? I've been intending to make little bags for my toiletries and just haven't had the time.....Now was the time!


Okay, I know you are thinking - what in the world could this crazy woman be containing in all those little bags? Another true confession - I'm a sucker for sample size bottles! And since I go on so many road trips I've discovered that it's really nice to have all my items prepacked so I don't forget anything, then all I have to add is my makeup and a hairdryer and I'm good to go (although I have been told that all you really need is a toothbrush!) My idea was to compartmentalize my items, you know - toothbrush, toothpaste, floss in one bag; shampoo, body wash, razor in another bag and so forth.
I decided to take photos of the process and turn it into a tutorial of how I make little bags. Sometimes I make a certain size based on what I want to put into it, other times the size of the scrap of fabric determines the bag size. Doesn't matter, something will always fit inside so there's never a bag too little or too big! You can use a single fabric, quilted fabric, or even get fancy and line the bags (to do this you would use two fabrics wrong sides together, then treat as a single unit following the same directions).
 For example, I wanted a bag to hold my body spray and lotion. Of course I couldn't have just one set, after all, until I wake up how will I know if I'm in the mood for Bath & Body Works' Coconut Lime or Victoria Secret's Love Spell (here I used those empty travel bottles that you can get at Wal-Mart or Target and filled up with my favorite fragrance). Oh, and for the record, I put the matching body washes in the 'shower bag' - the one holding the shampoo and the travel size sponge puff...
Okay, so once you determine the size (fabric folded at the bottom) you then go to your zipper stash and find a zipper. Notice that I'm not concerned with the size - in fact, I've found that it's better to be bigger...and the nylon or plastic teeth are easier to work with than the metal ones. Color doesn't matter either as these are just little fun bags. Use whatever scraps and whatever zippers you have.
 Now I'm going to show you the fast and furious way of sewing these little bags -- trust me, it's going to take longer to read this than it is to do it!
Using a zipper foot, center the zipper tab side down over the right side of the fabric - you do want the ends of the zipper to come off the edge of the fabric if possible, it makes it easier in a later step...
 With the edges flush (right sides together as described) use your zipper foot to sew down one edge. Then open it up and finger press the fabric away from the teeth of the zipper and top stitch.
 Now you are ready for the second side of the zipper. Can you see how I have the bag folded over to expose the right side of the other side? I'm going to match up my fabric to make sure it's straight on the sides then place the zipper pull side down on the fabric as previously done on the first side.
 Then I'm ready to stitch down that side of the zipper.
 Once complete it's time to top stitch this side. This is where it comes in handy if the zipper is longer than the bag because you need to open it up to be able to top stitch and if the zipper is longer then the pull tab is out of the way of the zipper foot and you have a prettier top stitch. If your zipper is the same length as your bag you will have to stop and start a few times as you adjust the zipper pull to be out of your way. It's okay if you bobble some, remember, this is a little bag for your personal enjoyment - there are no bag police that are going to judge you on your finishing skills!
 Now see, wasn't that easy! Betcha never knew putting in a zipper could be so fast! Next you will be sewing the sides of the bag together. It is very important that you position the pull tab somewhere on the interior of the bag and leave it open enough to be able to turn the bag when you are finished. I like to offset the fold of the bag with the zipper just a tad lower than the top fold of the bag instead of the top of the bag, or you could put it in the center as I did on one of my smaller bags shown in the collection above. Play around with different positions and see what you find most pleasing.
 Right sides together sew one side of the bag, sewing through the zipper - I don't pin the open ends because I just don't use pins (grin) but if you feel more comfortable doing this you may, it will slow you down on your "5 minute" bag but hey, we're not in a race (grin). Truthfully, the zipper teeth sometimes gap a little, but not enough that it bothers me!
 To keep it speedy when you finish the first side don't clip the thread and just keeping stitching that second side. Yes, I do back tack at the stop and start of each side and I do use my back stitch to go over the zipper a time or two for added strength.
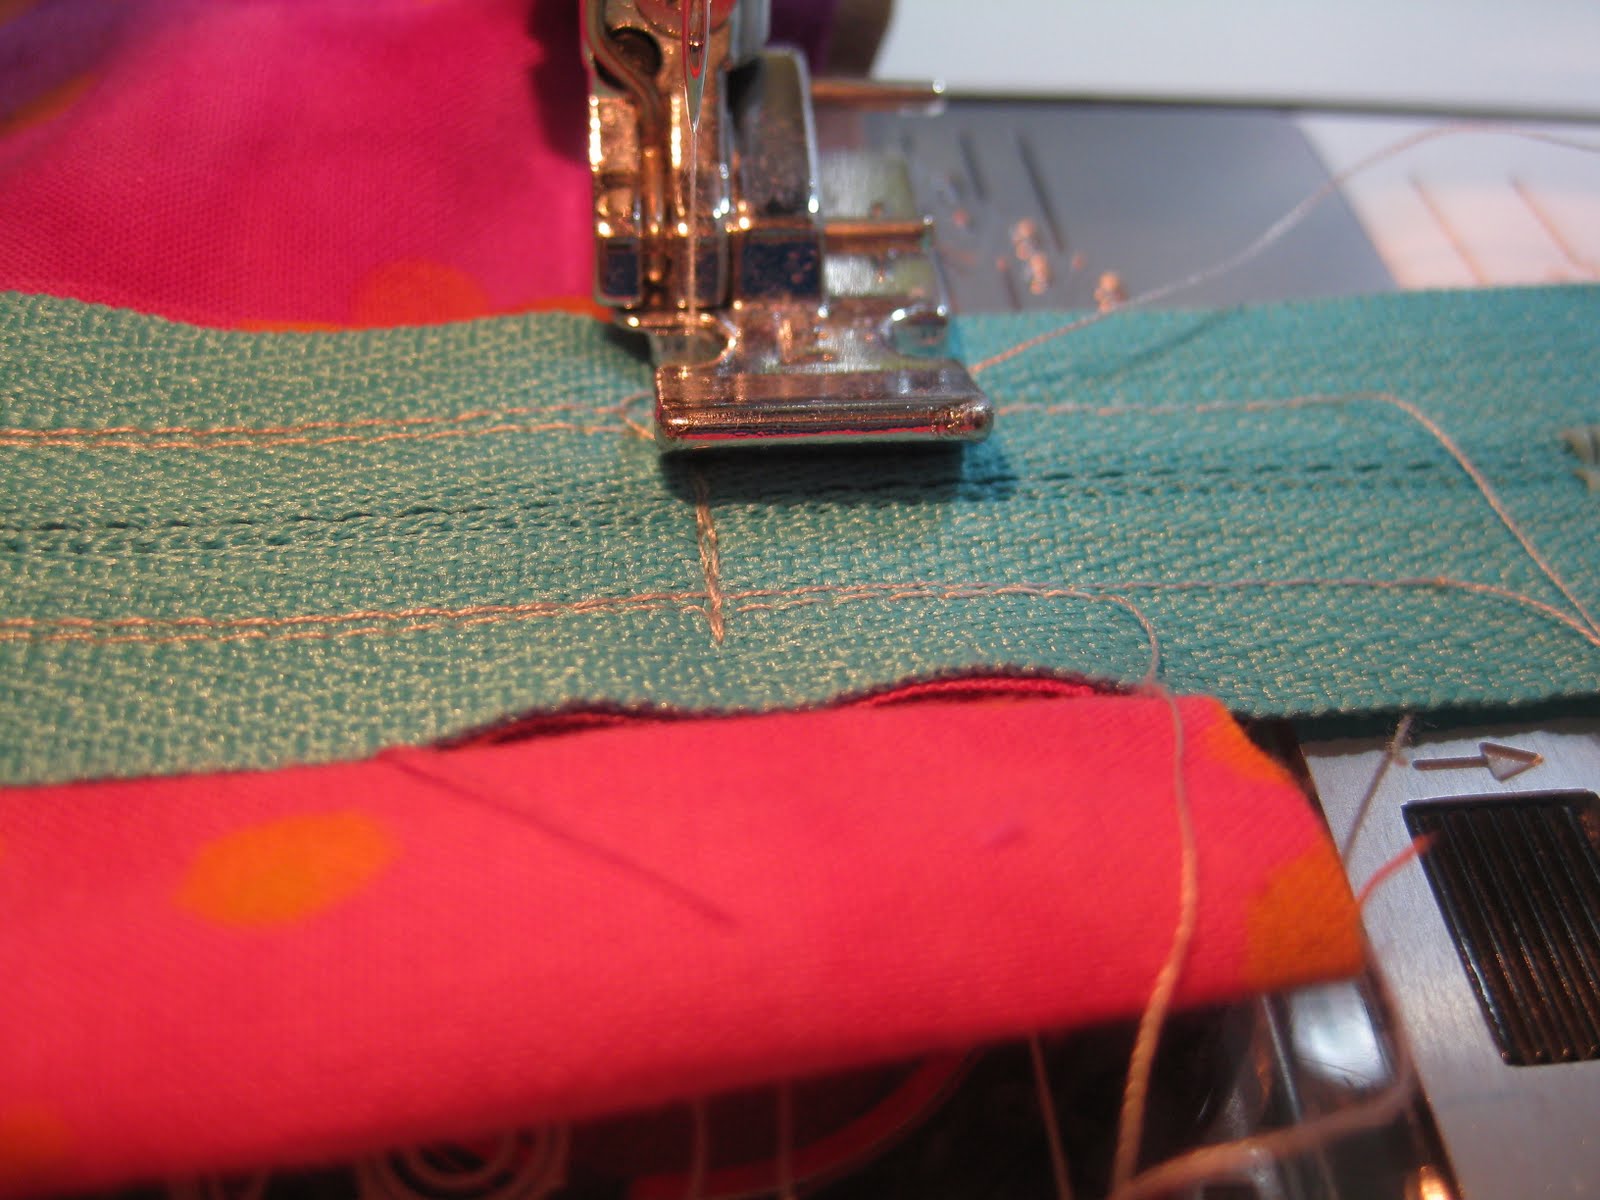 Almost finished! Now you need to trim all those strings and the extra zipper length. I prefer to use titanium scissors by Fiskars because I know they will cut anything. A good pair of kitchen scissors will do the trick too, obviously you wouldn't want to use your best fabric scissors. And yes, if you did use a metal toothed zipper, this will still work - just be slow sewing over those teeth and use the stronger scissors to trim.
 Turn the bag right side out, push out those little corners, and fill up!
 Ta-da! Now you are ready for anything with a cute, colorful, functional little bag! I hope you agree that a girl just can't have too many bags....except I'd like to figure out a way to get rid of the bags under my eyes! Especially when I stay up until the wee hours sewing little bags!!
8 comments:
oh, thank goodness....i'm not the only one.
i have pouches made very similar to your little pouch (for the trail sizes) but i'm so obsessed, that i went a step further and sewed one side in clear vinyl as to quickly determine what was in that pouch...
i know...but we all have to have quirks...
shannon
Great tutorial (and confession) Karen! Thanks for sharing.
Nice tutorial Karen! Thanks for sharing. Now, we're going to be looking for more tutorials!
Shannon, that's a wonderful idea to make one side vinyl - do you have any problem sewing through it? seems it would want to cling to the feed dogs ... tips would be appreciated!
karen@quiltsnkaboodle.com
Cute cute bags! Nice tutorial. I love bags of all kinds and sizes. Shannon's idea of clear vinyl is a good one!
Karen, thank you so much for that tutorial! I finished my first two bags. Now I have to go shopping for more zippers. I love little bags...
Nina from Frankfurt/Germany
Karen, thank you so much for that tutorial! I finished my first two bags. Now I have to go shopping for more zippers. I love little bags...
Nina from Frankfurt/Germany
Thanks for stopping by the blog Nina! Here's to many more bags in your future!
Post a Comment